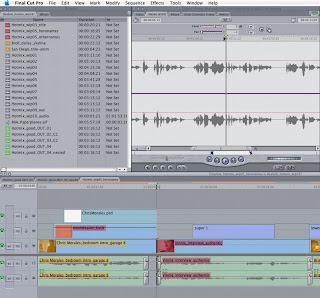
The Ripple tool is located in the tool bar and can be activated by the keyboard shortcut RR. (The Ripple tool looks kind of like a figure 6 - it actually represents a rolled up film strip). To Ripple an edit you must select it first. That means clicking on the seam of the edit. A shorter and better way to select an edit is to position the playhead on the edit with the up and down arrow keys and then hitting V.
To effectively Ripple your edit you need to make a decision about which of the two abutting clips you will be extending to the right or to the left. Do you want to extend the In point of the incoming clip or the Out point of the outgoing clip? By hitting the U key after having selected your edit you can choose which clip you are extending. Notice the highlight jumps to the left or the right of the edit. Make sure your Timeline playhead is on the selected edit, this is important for watching the edit in the Canvas.
Once you have decided which clip you want to extend (to the left or to the right) you need to load that clip in the Viewer for a closer look. Double clicking on the clip will load it in the Viewer. Double clicking the clip in the Timeline can be done even though the Ripple tool is still active. Once in the Viewer you can select the Audio Tab to see the Audio Waveform. A good thing to do at this point is to hit SHIFT - Z to fit the whole audio waveform into the viewer window so you can see the In and Out points clearly.
 In this picture I am trimming the In point of the Incoming clip. Note the waveform in the Viewer. (click for larger image)
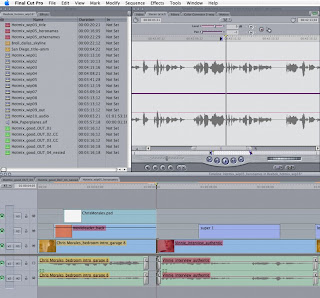
Very Important: at this point you must activate the Timeline window, by clicking on it's title bar (get in the habit of clicking on the title bar of the window you want to activate). Then by using the < and > keys you can trim your edit in one frame increments to the left or to the right. Keep an eye on your audio waveform in the Viewer for the actual spot you want to trim to and the In or Out point will move along as you hit < and >. (Note: the Playhead will not move along with you so you need to keep an eye on the Mark point and the waveform, not the Playhead.) You can also use SHIFT > and < to edit in multi-frame increments, that you can set in the User Preferences.
 Here I have trimmed the In point of the Incoming clip to the left a few frames. Note the new position of the Mark In. The Viewer Playhead has not moved, while the Timeline playhead remains on the edit. (click for larger image)
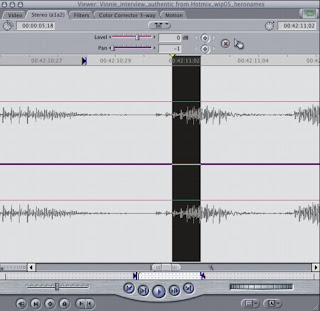
Using this method you can trim an audio edit visually by simultaneously looking at the Viewer and the Canvas while you trim in the Timeline. Additionally if you zoom in to the Viewer (Command +) you can hone in on a very tiny area of the audio clip and make micro-edits. The whole advantage of doing your Ripple in the Timeline while watching the audio waveform in the Viewer is that you can simultaneously watch the updated video frame in the Canvas. The Canvas will update to the current new In (or Out) point as you trim. This way your Timeline playhead stays on the frame you are editing, while your Viewer playhead is untouched.
 Command + will zoom in to the waveform in the Viewer. The black bar represents one frame of video. (click for larger image)
(Remeber, to play back an edit it is always better to hit the \ key. This plays back the edit without the trouble of mousing around in the Timeline.)
Have Fun! :)
ps: feel free to ask any questions if you are still puzzled about something!

1 comment:
Beau,
Hey. I just found this nifty little free app that allows you to do a screen capture and post, tweet, email, publish to YouTube, etc...
http://screenr.com
You may find it handy for demos on your blog.
Cheers,
Dave Campbell
dave@3ringsmedia.com
http://3ringsmedia.com
Post a Comment